Wednesday, March 27, 2013

Chalkboard Paint Week! : Easy Menu Board


I know...long title for a post..sorry about that! :) I thought it would be fun to do multiple post this week all dedicated to chalkboard paint and the fun things you can do with it! Its super easy, affordable, and the possibilities are endless! I'll give you a few ideas :) 

First things firsts: Chalkboard paint. I just use the ol' regular black paint. I LOVE the look! I guess I like my chalkboard projects to look like a chalkboard :) There are tons of recipes where you can make your own chalkboard paint and tint it whatever color you want. I have not tried these yet but go ahead! :) This is the paint I use :
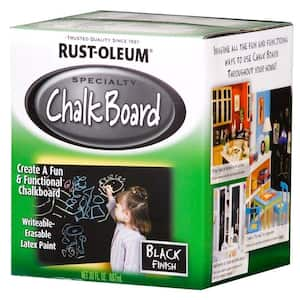
Rust-Oleum Specialty 30-oz. Specialty Flat Chalkboard Paint 
You can find it at Home Depot for just over $9..and it last FOREVER!! I have used my ONE can for all the projects I will be showing you this week, and I still have tons left! So I would recommend getting this verse the spray cans, they don't last nearly as long and are about the same price. 

Check out my first project, a chalkboard table for kids!

Project 2: Easy Menu Board:

This project was SUPER easy!! And I love having a menu board to help me stay organized with meals. For this project I found a large picture frame at the DI (thrift store) and simply painted it!!


Beautiful before picture right? :)
I got this for just a few dollars!

I took the picture out of the frame, and then painted the frame itself. Next I simply painted the back of the picture with Chalkboard paint! Sand it down quickly first, just to make sure it is all smooth. Then paint! I paint with a foam brush and usually do 2 coats, letting it dry in between. Once again....after you have painted the chalkboard, you need to let is sit for a few days without touching it! Then you will want to "condition" the chalkboard. Simply rub chalk all over the chalkboard then wipe clean with a dry rag. You are done with another easy chalkboard project! :) 


Now I just need to work on my chalkboard penmanship..   :) 


Monday, March 25, 2013

Chalkboard Paint Week!!: DIY Chalkboard Table for Kids

I know...long title for a post..sorry about that! :) I thought it would be fun to do multiple post this week all dedicated to chalkboard paint and the fun things you can do with it! Its super easy, affordable, and the possibilities are endless! I'll give you a few ideas :) 

First things firsts: Chalkboard paint. I just use the ol' regular black paint. I LOVE the look! I guess I like my chalkboard projects to look like a chalkboard :) There are tons of recipes where you can make your own chalkboard paint and tint it whatever color you want. I have not tried these yet but go ahead! :) This is the paint I use :
Rust-Oleum Specialty 30-oz. Specialty Flat Chalkboard Paint 
You can find it at Home Depot for just over $9..and it last FOREVER!! I have used my ONE can for all the projects I will be showing you this week, and I still have tons left! So I would recommend getting this verse the spray cans, they don't last nearly as long and are about the same price. 
So lets see our first project!!

Chalkboard Table for Kids:

This is a super easy project that your kids will LOVE. All the kids on our street always want to draw on this table :) 

I just bought an old coffee table off KSL for $10:


And then I painted it!! Easy as that :) I didn't take many pictures of the process but it was simple.

I sanded it down quickly to help smooth it out and so the paint would stick better. I decided to paint the legs a different color (not chalkboard paint). I put the coffee table upside down so as not to worry about painting the top, and quickly painted the legs. I did 2 coats, letting it dry in between.

When the legs were all dry, I stood it back upright and quickly painted the top with the chalkboard paint. I used a foam brush and once again did 2 coats, letting it dry in between. 

Once it has dried for a day or two (I know that seems a while but try not to touch it! ) you will want to "condition" the chalkboard. Simply rub chalk ALL over the chalkboard, then wipe off with a dry rag.

And you are done! :) Let the Kids enjoy it!!!


 I made this simple chalk holder by hot gluing twine (from Walmart) to the outside of a (clean) sour cream container! Super easy, cheap, and cute :)


Lucy Loves it! ..and you can always tell when Dad is enjoying it as well..somehow pictures of guns will appear?? :)

..and I don't really know why there is a hammer and other tools on the table..
we were probably working on another project!! :)


Tuesday, March 19, 2013

Blue Chandelier Make-Over!

Chad has been saying over and over again that this was his favorite project EVER! :) Its amazing what a little spray paint can do!!! A few weeks ago we were walking around Restore like we often do when I spotted this bad boy and instantly fell in love!


This was one large, heavy duty beauty that I couldn't pass up and I knew exactly where it belonged! :) And I will show you how an old $30 chandelier like this along with a couple cans of spray paint can soon become a highlight of your home!

...Its super easy :)

First thing ya need to do...Clean it!
Wipe it down WITH VINEGAR! This will save you! This is a handy tip that I learned via Pinterest :) Wiping down metal objects with vinegar before you paint them helps the paint to stick. I know..I was a little hesitant at first too that's why I tried it out for you :) And I will NEVER paint metal again without first doing this! I didn't have any trouble with the paint sticking, or chipping off after. And this is a 40 pound chandelier that took a lot of gripping, twisting, and handling to hang :)

After it's all clean and vinegar washed you are ready to paint! I did not want to paint the white candle-stick looking area on the lights, so I quickly wrapped them with tin foil to protect (plus you don't want paint getting in the light socket area!).


Now go to town painting! Make sure you get all the different angles..this is the challenge! I was under the chandelier, standing above on a ladder, on each side..etc. Check from several different points of view and at several different times to make sure you get it all painted.

I just grabbed spray paint from Walmart--I needed 2 cans. The color I used was called "Blue Ocean Breeze".


After it is all painted and dried remove the tin foil and put in the light bulbs :) ...My "candle stick" area (not sure what its called..?) was a little brown at the top and at first I thought of painting it white. I then realized that they actually slide out and are long enough to just flip over! ..My pictures will help explain: 

 
..dirty and worn at the top..

Take it right out! The other end (on the left) is clean and in perfect 
condition. Flip it over so the clean side is on top.


Now it looks brand new! :)

Now hang it and you are done!!!! Enjoy!
..I put ours hanging over staircase...so from upstairs you are eye level with it!! I LOVE it! And I took a billion pictures to prove that I do! ;)


...my view coming out of our bedroom every morning :)
.. remember our cute Gold Polka Dot Bathroom in the background?


Monday, March 18, 2013

Entry Way Makeover: Painting Stripes the Fast Way!


I'm super excited to share our Entry Way Makeover with you today! Along with this SUPER easy Tutorial for painting stripes......without measuring!!!!!!!!!!!!! That's Right!! ;)

Here are some "Before" Pictures of this space:


...Super plain and boring! :) Our Entryway is really small...which makes decorating hard! I'm not able to put a cute table in this small area, which is the standard Entry decor right? :) I decided painting the wall for a bright effect would be fun!

I've been wanting to try stripes for awhile but everyone always tells me how hard it is! AHH! I didn't want a project that took all week....So I found another way to make stripes..without measuring a thing!!!!!! And the whole project only took me 2 Hours!!!!! That includes the horrid taping time as well :)

So what did I do? It's quite simple really..I found a board out in the garage that was about the width I wanted my stripes to be and I TRACED IT! That's it! :) Here are some pictures to kind of guide you:


I know its kinda hard to see my lines and whats going...its also kinda hard to take pictures of yourself doing something... hehehe! :) I did it while the Hubby was a work and Baby Girl was sleeping. I apologize for not having the best pictures but I'll explain as I go! 


I just took this board (making sure first that the sides were level and straight!!)  and put it up on the wall and traced it with a pencil, moving the board down as I needed.  The squiggly lines that you can see above help me to clearly see every-other stripe. I scribbled in the area I would be painting to help me from getting confused! :)


Here is a picture of all my lines..now I just had to tape! 


Taping is what takes the longest....the tracing and painting goes really fast! Make sure all you edges are secure! I would run my hand along the wall where the tape was a few times just to make sure it was secure and that paint couldn't leak under. 

Now paint!! I used a small roller and went over it real fast...doing 2 coats of paint total. 


As SOON as you are done with your second coat (or however many you feel it needs to cover well), take your tape off!! Don't wait for the paint to dry before doing this! It makes it A LOT harder to take off and sometimes the paint will peel off with the tape.

And you are done!!


I Finally got some pictures up on the wall as well! Here are the "After" Pictures:


I love it!!!!! My Entry way feels a lot better..more welcoming :) 


Wednesday, March 6, 2013

Easter Pallet Art Tutorial


I am loving all the Easter Decorations that are floating around on Pinterest right now! Especially all the cute little Bunnies! I also see a lot of these mini pallet portraits and love them! As soon as I saw one I knew exactly how to make one--for free!!!!!!! :) And is was SUPER easy! 

Supplies:
10 Wooden Paint Stirring Sticks--Lowe's and Home Depot have these FOR FREE
2 Colors of paint 
Hot Glue Gun
Bunny Silhouette 

And here comes a ton of pictures to show you how it works ;)

These are the paint sticks that you have probably seen or used before. Like I mentioned above, Home Depot and Lowe's both carry them and you get them for FREE!! This is what we will use for the "pallets". But first you will need to cut off the handle area so you don't have that little swoop. The picture above shows a stick before and after cutting.
Cut all 10 Sticks.

 Line 2 of the sticks up vertically, 
these will be the back support or brace for the other 8 pallets.

Place some hot glue on each of the vertical pieces. 
Place a pallet piece on top, horizontally. Put pressure on it
to make sure it is secure and the glue sets. 

Continue gluing the rest of the pallet pieces in place. 
I purposely did NOT line mine up perfectly, giving the edges a rugged and scattered look.


This is what it will look like once its all glued together...
Front:

Back:

Now paint all if it the color you want your Rabbit to be. I used white, it would also 
look good if you just wanted to stain it!
Let the paint dry.

Meanwhile, get your bunny silhouette all cut out and ready :) Find an image you like. 
I just went to Google Images and typed in "bunny silhouette" and picked my favorite one. Print it off--I did mine on a gray scale to save a little ink :)


Cut out the Rabbit so you only have its Silhouette. 


 I used painters tape to secure it to my pallets..so it wouldn't
move while painting.


Once your silhouette is secure you are ready to paint your second color! 
Paint all the pallet area that is left showing.
When painting close to the silhouette, I would push down on it to help prevent paint
from leaking under. 


Once it is all painted, remove the Bunny Silhouette.


Let it dry.

Once it was dry I took a soft sponge sander and lightly distressed it.


And you are done!!!!!!! 

I LOVE how it turned out! Its easy enough that
I might have to make one for every Holiday ;) Enjoy!